Biostar TPower I45
Aug 11th, 2008 | By Jared
Biostar TPower I45
Date
: 08/11/08 – 01:53:16 PM
Author
:
Category
: Motherboard
Page 1 : Index
Manufacturer:
Biostar
When it comes to hardware these days, the frenetic pace set for new hardware and motherboards is no different. Intel's success with their previous P35 chipset has had many awaiting their latest, the P45, codenamed 'Eaglelake'.
While it seems that motherboard prices keep climbing higher and higher, Biostar has managed to keep boards reasonably priced but still loaded with performance and features. Biostar has satisfied many customers with their T-series line of motherboards and with the introduction of the AMD-based TPower N750, they have progressed from the TForce line.

With the release of the Intel P45 chipset, I have the opportunity to take a look at Biostar's latest offering in the TPower line of motherboards, the TPower I45. By combining their latest advancements with Intel's latest chipset, Biostar looks to deliver performance and features for a great price.
Page 2 : Package and Accessories
The box for the TPower I45 is nearly identical to the TPower N750.
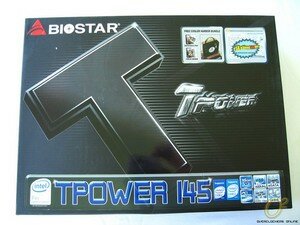
Biostar uses a large black box with a large 'T' on the front representing the TPower. The product name is along the bottom with graphics about CPU support and some features. On the top right is another graphic for Biostar's Cooler Harbor feature and a screenshot claiming a FSB of over 600MHz reached.

The back of the box has a more thorough list of features with short descriptions of each. On the bottom is a description of the included software, which will be covered later in the review. On the right is the feature list of the board along with a small picture of the motherboard.

The sides of the box are empty except for retail information with the barcode, model number and quick list of features.


Identical to the TPower N750 packaging, the accessories are located in a box located on top with two compartments.


Included are six SATA cables, six Molex to SATA power cables and one IDE cable in the left compartment. In the right compartment is the manual, Cooler Harbor fan, SPDIF cable, I/O panel and the driver and Utility CD.

Underneath the accessories box the motherboard is set in between some cardboard supports for protection.
Page 3 : Features and Specifications
The heart of any motherboard is the chipset and is largely what determines the strengths and weaknesses of a motherboard.

Taking a look at the chipset chart, it looks very similar to the previous P35 chipset. As the successor to the popular P35, the P45 chipset contains many of the same features with a few improvements. The more notable additions are PCI Express 2.0 support and doubling the maximum memory amount to 16GB from 8GB. While you will still need to purchase one of Intel's performance chipsets to run two PCI-E in full x16 mode, you now get two running at x8 as opposed to the previous 16x and 4x. Also of note, while Intel doesn't list 'official' support for 1600 FSB, as you will see below Biostar does list it as supported.
For specifications and features I grabbed them straight from Biostar's site here.
Chipset:
Intel P45 / Intel ICH10R
HIGHLIGHTS

MAIN

CPU SUPPORT
Intel Core2 Extreme Processor
Intel Core2 Quad Processor
Intel Core2 Duo Processor
Intel Pentium Dual-Core Processor
Intel Celeron Dual-Core Processor
Intel Celeron Processor 400 Sequence
FSB
Support FSB 800/1066/1333/1600MHz
MEMORY
Support Dual Channel DDR2 667/800/1066/1200(OC) MHz
4 x DDR2 DIMM Memory Slot
Max. Supports up to 16GB Memory
EXPANSION SLOT
2 x PCI Slots
2 x PCI-E x1 Slot
2 x PCI-E x16 2.0 Slot (CFX x8)
STORAGE
6 x SATA2 3Gb/s Connector
2 x eSATA Connector
1 x IDE Connector
Support SATA RAID: 0,1,5,10
USB
6 x USB 2.0 Port
3 x USB 2.0 Header
GbE
Realtek RTL8111C – 10/100/1000 Controller
AUDIO CODEC
Realtek ALC888S 8+2 Channel HD Audio
REAR I/O
1 x PS/2 Mouse
1 x PS/2 Keyboard
2 x eSATA2 3Gb/s Connector
6 x USB 2.0 Port
1 x RJ-45 Port
6 x Audio Connector
INTERNAL I/O
3 x USB 2.0 Header
6 x SATA2 3Gb/s Connector
1 x IDE Connector
1 x Floppy Connector
1 x Front Audio Header
1 x Front Panel Header
1 x CD-IN Header
1 x S/PDIF-IN Header
2 x S/PDIF-OUT Header
1 x CPU FAN Header
2 x System FAN Header
1 x Serial Header
DIMENSION
ATX Form Factor Dimension: 30.5 cm X 24.4 cm ( W x L )
OS SUPPORT
Support Windows 2000 / XP / XP 64 / Vista / Vista 64
ACCESSORIES
1 x IDE Cable
6 x SATA Cable
6 x SATA Power Cable
1 x S/PDIF Cable
1 x I/O Shield
1 x CD Driver
1 x User Manual
1 x DIY Thermal Kit
Page 4 : Layout
Now let's move on to the board layout.

The layout of the board at first glance is far improved over the TPower N750. The memory slots and heatpipe assembly allow for plenty of room for even the largest of heatsinks. It's nice to see solid capacitors all over the board, sure to ease your mind if you've had leaky caps in the past. Let's move on and take a closer look.

The four memory slots are in two color coded pairs, this may seem like a no brainer but I have seen enough boards with some odd colored schemes. The 24 pin ATX power connector is located along the edge.

Spacing looks good around the CPU socket. There is a 4 pin CPU fan header to the left and the 8 pin motherboard power connector on the right. As mentioned earlier there should be ample spacing around the socket for most any heatsinks.

The back I/O panel sports PS/2 mouse and keyboard ports and a total of 6 USB ports. There is one LAN connection and nice additions are two eSATA slots. Rounding out the back are 6 connections for the onboard 7.1 sound processor.

Sliding down the board there is the 4 pin Molex power connection for auxiliary power for video. Just below that are the Realtek RTL 8111C LAN controller and Realtek ALC8888S 7.1 sound processor along with SPDIF and CD in connections. Two PCI-e x16 2.0 as well as two PCI-e 1x slots reside just below the Molex connector. Rounding out the PCI connections in this area are two PCI slots with the SPDIF out connection situated in between. Finally along the bottom edge of the board is the front audio out, SPDIF IN, Serial port and floppy connections. I'm not too thrilled with the location of the front panel audio header as it is basically as far from the top of the case as it can be.


Continuing to the right along the bottom edge are three USB headers and the front panel header. Just above these reside the onboard power and reset buttons that come in handy when building the system. Next we have the IDE connection, CPU temperature/BIOS POST code display and six SATA connections. The SATA connections are arranged vertically which ensures that even the longest graphics cards will not eliminate your SATA connections. On the top left is a familiar sight from the N750, the eight red jumpers for switching to dual card configuration, CrossFireX on the I45. It's not the most elegant solution but you honestly don't change this setting too much for it to really be a negative. Also in this area is the Fintek F71887F Super I/O controller, for fan speed and environment monitoring, along with the Marvel 88SE6121 controller for IDE and eSATA functionality.

A quick look at the back of the board reveals no hidden capacitors that might interfere on the bottom.

The heatpipe assembly connects with four push pins and two TIM pads ensure contact with the Intel P45 chipset. The Intel ICH10R gets a small heatsink with a coating of white thermal paste (removed in this picture).


With the respective heating solutions removed here are the Intel P45 and ICH10R chipsets.
Page 5 : Installation
With a much better layout than the N750 I didn't expect any issues with installation and actually only found one.

The only issue I had with hardware installation had to do with the included DIY Thermal Kit. With the Thermalright Ultima 90 facing top to bottom, the sides came in contact with the fan on the thermal kit. Since there is a small lip on the backside of the heatpipe assembly the fan can only be mounted in this fashion.


With the heatsink situated left to right, it looked at first to be OK, but then the bolts for the bracket interfered with the fan as well. It seems that the thermal kit may be hit or miss on whether it will fit or not.

I decided to remove the fan and allow the airflow from the heatsink to provide airflow through the thermal kit for testing.

Aside from the issues with the DIY thermal kit, I didn't experience any other issues with installation. Here with everything installed and powered up in the Antec 300 you can see the CPU temperature display and the lit up power and reset buttons.
Page 6 : BIOS
The BIOS is the first stop for most tweakers after getting the system installed. I'm going to touch on a few details of the main screens. Biostar uses a BIOS from AMI so this should be familiar to most users.

Here is the main screen for setup of date, time and SATA setup information

Next is the advanced section for setting up many of the health functions and onboard devices.


PCI/PnP and boot settings are pretty self explanatory.

The chipset section has some basic functions for the north and south bridges.

The O.N.E. (Overclocking Navigator Engine) is quite simply where all of the overclocking and tweaking options are located. Within the O.N.E. tab are voltage adjustments, with ranges as follows:
CPU Voltage: -0.05 ~ +1.20
DDR Voltage: +0.05 ~ +1.85
Chipset Voltage: +0.025 ~ +0.70
FSB Voltage: +0.025 ~ +0.75
This should be a good enough range for just about everyone. Now it's time to move on and do some testing.
Page 7 : Software and Overclocking
Before we begin with the testing and benchmarks, I'll touch real quickly on Biostar's TPower2 software suite.


The TPower2 software hasn't changed any since I last saw in my review of the TPower N750. There are four sub windows total, the first two shown here are the OC Tweaker and BIO Watch. The same as my earlier experiences, the automatic overclocking settings merely raise the FSB in small increments but doesn't seem to affect any other settings.


The last two sub windows are the eHot-Line for troubleshooting and the Biostar Flash for easy updating of your BIOS.
While the TPower2 suite is stable and I encountered no issues, I still felt more at ease overclocking via the BIOS.


While I had high hopes of testing the FSB limits of the I45, it seems my Core 2 Duo E4300 hits a FSB wall at 390. I was also rather frustrated at my efforts to reach the same settings that I achieved on the P35 board, a 390FSB with an 8x multi (3.12GHz) with the memory running at 585MHz (DDR2 1170). I settled on 345FSB with a 9x multi (3.12Ghz) and the memory running at 552Mhz (DDR2 1104), not the greatest result but a good result with my limited CPU.
I am in the processes of obtaining a newer 45nm processor to further push the FSB limits on this board and will update this review with my findings. Also look for my review of the G.Skill PC2-8800 memory coming soon with further results on the memory.
Update
While I was less than impressed with my overclocking results on the E4300, it is quite a different story with an E8400. I got a hold of an E8400 and figured I could push the board quite a bit farther than with the E4300, and was I right. While its a bit short of those record results of 700+ FSB, I was able to hit 533MHz FSB on air and using a 7.5 multi reached 4Ghz. While I could push the FSB higher with the CPU, the memory is holding me back at this point. Read ahead to see the updated tests with these new results.


Page 8 : Testing Setup
Below are the specifications for the system that will be used for testing.
CPU: Intel Core 2 Duo E4300 (200×9)
RAM: G.Skill PC2 8800 2x2GB
GPU: Biostar 9600GT (ForceWare 174.16)
PSU: Ultra X3 600W
HD: WD 250GB SATA
DVD-Rom: LiteOn 18x DVD Burner – SATA
Case: Antec 300
Motherboards:
Biostar TPower I45
Gigabyte P35-DS3R
Each system got a fresh install of Windows XP with SP2 before benchmarks were run. All benchmarks were run a minimum of three times with scores being the average of those three runs. I ran both boards at stock CPU and memory settings and then also ran through the I45 at the overclocked settings.
Page 9 : Memory Benchmarks
I'm going to first start out with some memory benchmarks to compare how the memory subsystems compare in the two chipsets.

I used both Everest Ultimate edition and SiSoft Sandra XII.SP2c to run some memory latency benchmarks to begin with. Both programs returned very nearly identical numbers at stock settings and some decent numbers at overclock.

The Everest bandwidth numbers show consistent results across the board with the TPower I45 slightly edging out the P35-DS3R. Results obviously react well to the overclock, nearly doubling the numbers.

SiSoft Sandra bandwidth tests show similar results though it shows an even smaller gap between the two boards.

The final memory numbers we will look at is SciencMark 2.0's memory bench. Once again we have the I45 barely edging out the P35. I think it's fairly safe to say that the memory subsystem in the I45 is slightly better than the P35-DS3R, but just slightly.
Page 10 : System Benchmarks
Next I'm going to run through some more system oriented benchmarks.

I used SiSoft Sandra to measure how the boards handle processing power and I'll start with the Arithmetic benchmark. At stock settings we have an almost mirror image of the memory benchmarks with the I45 just barely beating out the P35-DS3R though it's more accurate to call it a tie with such small differences.

Moving onto the Multi-media benchmark it's a nearly identical margin of difference as with the Arithmetic benchmark. We are clearly seeing a pattern emerging between these two boards.

Turning to the Primordia and Molecular Dynamics benchmarks in ScienceMark 2.0 we see similar results to the Sandra tests.

Ok, so moving on to PCMark we are using a more system wide benchmark. Results here are a tie as the differences are way too small to judge. A common theme for most of the tests, a small difference in numbers but the majority of the time has the I45 on the plus side.

Next I turned to HDTach to see if there is a performance difference in the ICH9R on the P35-DS3R and the ICH10R on the I45. Seeing a common thread? Even in the HDTach numbers the results are extremely close. While the ICH10R adds some new features, it obviously didn't lose any performance compared to its predecessor.
Page 11 : 3D Benchmarks
Ok, so where would we be without some gaming benchmarks.

First I'll start with the battery of 3DMark tests from 03 up to 06. It almost isn't a surprise at this point to see the close numbers with the I45 just eeking out wins. The percentage of difference has been for the most part consistent through all of the tests and benchmarks.

With the results I have been getting throughout this testing session, I thought for sure it would be more of the same with the game benchmarks however here we have the largest margin of differences. The I45 easily outmatches the P35-DS3R in every gaming benchmark. This was quite a surprise to me after all of the previous close results, though it seems when it comes to games the I45 is clearly ahead.
Page 12 : Conclusion
So after all of the testing where does that leave us? Overall I am impressed with Biostar's latest TPower offering, the I45. Performance is on par or better than the P35 and you get some added features such as PCI Express 2.0 and increased memory support. Overall layout is well thought out and shouldn't cause issues with any setup.
Of course there are a couple negative points, one being the included DIY Thermal kit. I wish one had a little more flexibility with the mounting as the fan can interfere with tower style coolers. I'm sure by now most have seen the reports on the web of users overclocking the FSB beyond 700MHz. Unfortunately due to my current processor I couldn't test this out, but be prepared to tinker. Overclocking was far more finicky here than on my P35 board. Aside from these two points, it is a solid board that brings a lot to the table for not too much green.

Positives
- Plenty of tweaking options
- Bang for your buck
- Good performance
- Quality components
Negatives
- Tweaking can take some time and patience
- Interference issues with thermal kit
Overclockers Online would like to thank Biostar for supplying the TPower I45 for review.