Cooler Master Storm Sniper
Feb 27th, 2009 | By Jared
Cooler Master Storm Sniper
Date
: 02/27/09 – 05:01:24 AM
Author
:
Category
: Cases
Page 1 : Index
Manufacturer:
Cooler Master
We are once again visited by Cooler Master here at Overclockers Online. They have long been a favorite among enthusiasts with their quality cases, coolers and power supplies.

With an increasingly competitive PC case market, companies have to find ways to differentiate themselves from the crowd. With this in mind Cooler Master launched a new line called CM Storm. With the launch of CM Storm, Cooler Master is taking their years of research and experience and uniting with gamers and enthusiasts. You can read more about it at the CM Storm website.

The first product launched under the CM Storm program is the CM Storm Sniper mid tower case. Featuring a high airflow design and aggressive styling the Sniper is aimed at gamers and LAN goers. Continue on to find out if this is the enclosure for your gaming needs.
Page 2 : Package and Accessories
We'll begin our adventure by sneaking around the packaging of the Sniper.
Cooler Master uses the sniper theme on the packaging showing the case in a set of crosshairs on the front. The back continues this theme with a military like sniper with a rifle along with features and a few pictures.


On the sides is another picture of the case along with the case specifications.


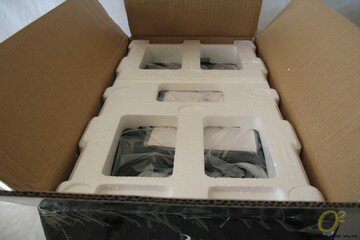
Once you open up the top of the box, you see the Sniper wrapped in a plastic bag and sitting between two Styrofoam cushions. This is pretty standard protection and does the job well.

Accessories included are two rubber inserts for watercooling hoses, a bag of screws, a good dose of zip ties, 3.5′ to 5.25′ bracket, instruction manual and 4 rubber feet.

Page 3 : Specifications
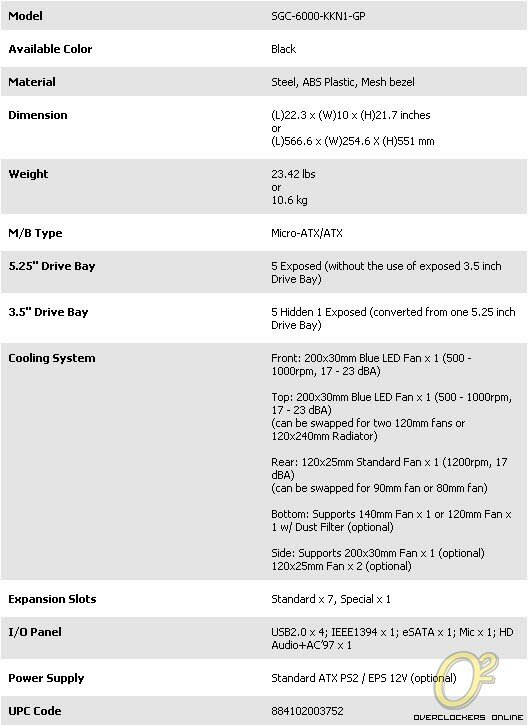
I grabbed the specifications straight from Cooler Master's product page here. You can also find information on the Sniper at the CM Storm website.
Specifications:
Features:
* Fierce exterior design inspired by military weapons.
* Unprecedented airflow from up to 3 huge fans.
* Next generation control center for tuning your lights and fans.
* StormGuard – ground-breaking security system for safeguarding your gaming peripherals.
* Convenient handle and foot stand for fast and efficient mobilization and relocation.
* Screw-less design for quick upgrades and maintenance.
As you can see the Sniper is made from steel and plastic so it does have a bit of weight to it, weighing in at a little over 23 lbs when empty.
Page 4 : Exterior
The Sniper is all black and from the front you can see the mesh that lines the entire front. The mesh allows for more airflow, but some may not like it to do an increased area that can collect dust. There are five external bays with the lowest one having a cutout for a 3.5′ device. The lower half houses the front 230mm fan. The front control panel has 4 USB ports, one IEEE1394 Firewire port, on eSATA port, along with microphone and headphone ports. Dominating the left side is the large power button, small reset button and the built in fan controller knob. The center of the fan controller wheel is a button to turn on and off the fan LEDs. The top of the case is slotted for the top mounted 230mm exhaust fan.


The section over the intake fan can be removed to clean the filter. This cover has to be removed before taking off the front panel. Each bay cover easily comes off by pressing on tabs located at either side.
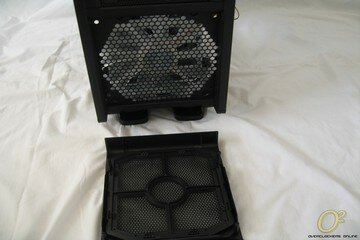
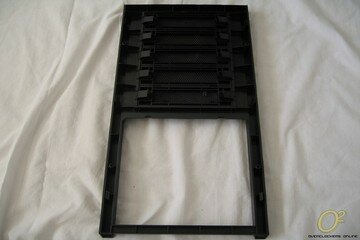
Once the front panel is removed each drive bay is open, so no metal covers to remove. The front intake fan sits behind another mesh cutout.

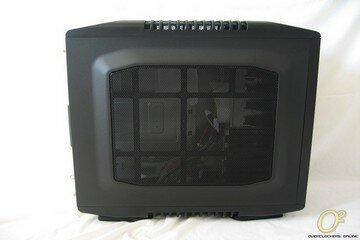
The left side of the sniper is a large mesh window that sits in raised portion of the panel. The right side is similar with a raised portion of the panel minus the mesh window. On top, to each side of the vent there are handles built in as well for transporting your rig.

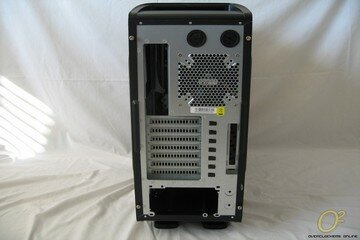
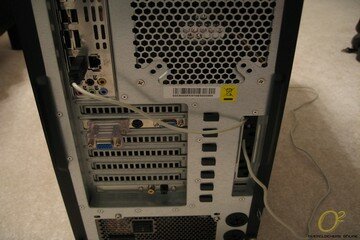
On the back side you'll notice there are two holes towards the top along with two smaller holes on the bottom for external water cooling setups. All of the PCI slot covers are vented and to the right of these is the peripherals security device that Cooler Master labels StormGuard. A 120mm fan vents hot air out the back.
The Sniper comes with four case feet that can be turned out to stabilize the case. Each foot has a rubber pad to help keep the case from sliding on smooth surfaces. If you don't care for these case feet, you can remove them and put on the rubber feet included in the accessory box.

Page 5 : Interior
Now to remove the panels and dig inside, as I mentioned earlier each panel has the center section sort of raised, this should allow for a little extra room for cable management behind the motherboard tray. The left side panel has mounting holes for an additional 230mm fan or two 120mm fans.


When I first removed the side panels I had a smile on my face as it looks very similar to the interior of the HAF 932. The tool free 5.25′ bay system returns along with the hard drive system, both excellent features from past Cooler Master cases. Another welcome addition is the cutout in the motherboard tray for heatsink installation.

The tool free PCI system from the HAF 932 also makes a return. A new addition is the StormGuard to protect your gaming peripherals while at LAN parties.

In the bottom of the case is a vent for the power supply and a screwless mount for a 140mm fan. You can also mount a 120mm fan with screws thought that requires removing the bottom panel of the case.

In the top is a 230mm LED fan that can be removed and replaced with 2 120mm fans or a watercooling radiator if you want. The top panel of the case has to be removed to access the screws for the 230mm fan, and once removed you can see the supports for the built in handles.


Moving around to the right side, there are cutouts in the top and bottom for cable routing and small notches around the edges of the motherboard tray to zip tie cables neatly.

As we saw earlier, with all of the front panel connections there are wires to go with them. Audio headers include HD-Audio and AC'97.


There are additional connections for two more LED fans from the built in fan controller. While power connections are standard, the LEDs on fans can only be controlled if they have a separate 3 pin connection wired in. Additional fans should be available for purchase from Cooler Master by March.
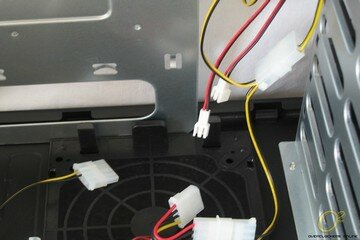
Here is a quick shot down the bottom of the case with the lower panel removed. This is where you would have to unscrew the lower fan bracket in order to mount a 120mm fan.

Page 6 : Installation
I won't bore you with a step by step install. With cases I like to take the installation section to point out any potential problems you may encounter.
Installation as a whole went quite smooth, however as you can see my Ultra X3 1000w power supply would interfere with a fan if it were mounted in the bottom. The X3 1000W measures in at 7.5′ or 191mm, so something to keep in mind should you have a larger power supply.
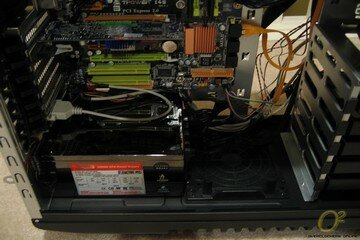
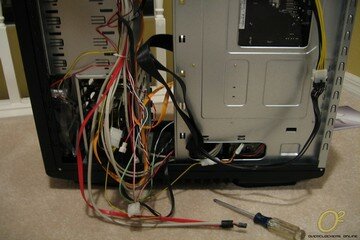
Really the biggest problem I had with the Sniper was organizing the wires. With so many features up front there are plenty of wires and each wire is long enough to reach any area in the case. A little patience and planning are required, especially if you plan on showing off that rig of yours at a LAN event.
While all of my peripherals are wireless, I managed to dig up a wired mouse to try out the StormGuard system.

Once powered up the blue LEDs of the Storm show brightly. I really prefer the red LED fans used in the HAF 932 since they are not as bright, but you have the option to turn them off with the integrated controller.

Some quick shots of the case in action from the front and side in the dark:


Page 7 : Testing
The following system was installed and used to gather temperatures:
CPU: Intel E8400
MB: Biostar TPower I45
RAM: G.Skill PI Black PC6400
Video: Sapphire Radeon HD4550
PSU: Ultra X3 1000W
HD: WD 250GB SATA
DVD-Rom: Lite-On 18x DVD Burner – SATA
OS: Microsoft Windows XP w SP2
Ambient Temperature: 25-26C
Cases:
Cooler Master HAF 932
Cooler Master Storm Sniper
To get idle temperatures I started the PC up and allowed it to sit at idle for 3 hours with no processes running and recorded temperatures using Everest Ultimate. All temperatures for the Sniper were taken with the fan controller set to high. A quick comment on the fans and the controller. At low the fans are near silent though they do make some noise on high, though it is more of air movement than mechanical noise. Since everyones tolerance to noise is different this is easily remedied by the fan controller.
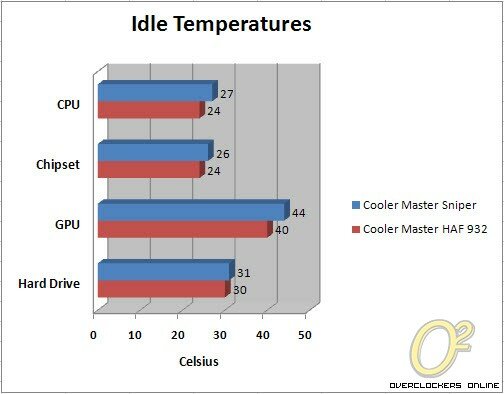
At idle the Sniper is not far off of the numbers of the HAF 932. Keep in mind the Sniper is using only 3 fans to the HAF 932's 4 and they are smaller in size as well.
Next was to load the PC and get some temperatures with a little more heat involved. To get load temps, I ran Orthos blend along with 3DMark06 in a continuous loop for 3 hours.

Under load we see somewhat similar results as we did under idle, pretty good numbers for the smaller Sniper.
Page 8 : Conclusion
After my tour of duty with the CM Storm Sniper case, I've come away with a positive experience overall. From top to bottom the Sniper packs in some useful features such as the built in fan controller and StormGuard peripheral retention system. The Storm shows that Cooler Master is listening to gamers and enthusiasts by including features from past cases that work and giving us new features that work.

It's not an easy task to really find negatives about the Sniper. Neat freaks may find their work cut out for them with the number and length of the wires. While the Sniper may be a little bit on the heavier side thanks to its steel construction, this also makes it quite solid and the integrated handles make moving it a cinch.
Cooler Master launched CM Storm to focus on the needs of gamers and if the Sniper is any indication of what is to come, there should be plenty of positives coming down the pipe. So whether you are a LAN going gamer or just someone looking for a case that is easy to work with, you owe yourself a look at the CM Storm Sniper mid tower.
Advantages
- Good airflow
- Built in fan controller
- Security features
- Handles
- Tool free
Disadvantages
- Larger PSU's may pose issue
- Wire wrangling
Overclockers Online would like to thank Cooler Master for supplying the Storm Sniper case for review.