SilverStone Element 500W
Feb 5th, 2007 | By Archive
SilverStone Element 500W
Date
: 02/5/07 – 02:13:05 AM
Author
:
Category
: Power Supplies
Page 1 : Index
Manufacturer:
SilverStonetek Co., Ltd
Price:
Back in 2003 SilverStone Technology stormed into the market as a high-end case builder. Their elegant enclosure designs were met with praise from the general public and industry critics alike. The original vision in which SilverStone Technology has grown from was to create "the most advanced and beautiful products available on the market". That vision holds strong as SilverStone advances into 2007 with more incredible enclosures than ever before.
SilverStone Technology has since taken their design philosophy to the next level with a team of industry leaders that have created more than just great cases in the last 3-4 years. The SilverStone brand encompasses not only computer enclosures but electronic enclosures, power supplies, CPU coolers and other accessories. All of which meet an esthetic level of perfection that is un-matched in the computer industry. Today here at O2, we will be looking at an interesting power supply that is engineered for Small Form Factor and HTPC enclosures.
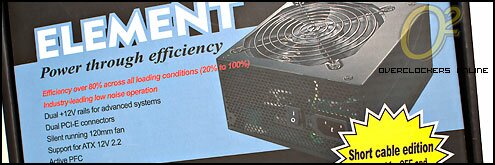
The Element series of power supplies are built around a near silent 120mm fan that isn't required to turn at high RPMs due to the highly efficient design focused at keeping temperatures down and heat output to a minimum. The feature that makes this ST50EF-PLUS different from the rest of the Element series is that the power supply we are looking at today is the Short Cable Edition. This edition has uniquely short cables designed for easier and cleaner installation in SFF and m-ATX enclosures.
Page 2 : Package
If there is hardware, there is bound to be a box with some sort of advertising or information on it. We will start off this review with a quick look at the package that the Element comes in from SilverStone.

Typical SilverStone stylings are used with this package and I happen to really like the theme SilverStone uses with their power supplies. Everything that comes from SilverStone is mature and well designed, both their packages and the hardware contained inside.

Despite being very simple and straight forward, the package also contains some important information about the power supply that it holds. The most important feature of this power supply is the fact that it is the short cable version and the bright yellow starburst clearly conveys that.

The edges of the package play host to an incredible amount of information and if one was to pick this package up at a computer store, they would be able to read pretty much every feature and specification about the power supply. This side briefly describes cables available and shows some "interior" photos of the power supply.

The specifications edge covers the complete spec sheet as well as voltage chart for this power supply. The specifications section coming up will cover all of this information so we will continue to work our way around the package edges.

The full cable breakdown is listed here as well as an efficiency chart. SilverStone designs their power supplies to maintain an 80% efficiency rating throughout the power range. They also claim that efficiency increases as the draw does. The image here states 6 SATA power connections but this power supply only has 2. I am assuming the package was printed for a different power supply and that is why the error is there.

The last of the exterior panels provides a brief specifications list in six languages other than English. The information listed here is simply a brief excerpt from the specifications listed on the side with the voltage chart.

The power supply itself is securely squeezed into the package with simply a clear plastic bag cover the exterior of the unit. The cables are tucked around two edges adding protection while two sides are protected by the cardboard package walls. Some people may wish for a more elaborate packaging providing more security for the power supply but in my opinion, this is more than adequate for a power supply.
Page 3 : Specifications
We are now going to have a look at the same specifications that sprinkle the package on every side. I pulled lots of the information found here from the SilverStone web site which is very well laid out. The SilverStone web site is very neat and tidy making it easy to find the product you are looking for. Each product has plenty of images that can be enlarged to a nice size and the information listed is everything you could ask for. We start with a look at the volts and amps that this power supply can produce in the Output chart:

I like how SilverStone is very honest with their Output chart and list not only the Maximum Amps but also the Peak Amps. The primary values I am interested in are the +12v rails and we obviously have two here with the ST50EF-PLUS. Each is rated at a maximum of 18A and peak of 19A. If you look at the bottom of the chart, the combined +12v output is 35A with a peak of 38A.

Other features of the ST50EF-PLUS include auto input switching which is indicative of Active PFC which of course this power supply is. The efficiency is listed at greater than 80% which is what we want to see and there are all the usual protection features built into the unit as well. The last of the mentionable items is the single 120mm fan that the ST50EF-PLUS uses which is listed at a noise level of 21 dBa which should result in near silent operation.
Cable Lengths:
I measured from the base of the connector to the cable tie at the PSU box.
1X 20/24 Pin Motherboard Connector
|———-11.75"
|————>>
1X 4+4 Pin ATX12V CPU Connector
|————12"
|————>>
1X 2 X 4-Pin Molex Connectors + 1 X 4-Pin Floppy Power Connectors
|———-12.25"—-3"—-3"
|————>>——>>—->>
2X 2 X 4-Pin Molex Connectors
|————12"—-2.33"
|————>>——>>
1X 2 X 5-Pin SATA Connectors
|————12"—–3"
|————>>——>>
2X 6-Pin PCI-E Connectors
|—————–15.5"
|——————>>
The SilverStone web site has the cable lengths listed at 11.8" with 3" lengths in-between connectors. You can see my measurements are ever so slightly different but they are pretty much the same.
According to the manual included with the power supply, this is how the two +12V rails are distributed:
20/24-Pin MB connector
1 X 4-Pin ATX 12V Connector (Yellow)
4-Pin Molex Connectors
4-Pin Floppy Connector
5-Pin SATA Connectors
6-Pin PCI-E 1
+12V2:
1 X 4-Pin ATX 12V Connector (Yellow/Black Stripe)
6-Pin PCI-E 2
Page 4 : Package Contents
Like any power supply, the package contents aren't too elaborate with just a simple instruction booklet and a power cord.

I have pulled the contents out and laid them out here. The manual that is included provides all the specifications that you normally find as well as the pin definitions that I used in the Specifications on the previous page. I was also pleasantly surprised to see a package with 4 black screws to secure the power supply to the case. Small details like black screws really make my day.

The power supply itself is clad in a black outer shell. I personally really like black so an all black power supply is right up my ally. It will match perfectly with the black case in which I will be test fitting the power supply in, which also happens to be SilverStone.

SilverStone has decided to use a fairly standard design for the Element power supply. The front of the power supply is completely honey-combed to allow the air from the 120mm fan to be pushed out of the case. The lack of a 120v/240v switch indicates true active PFC.

The one side panel has a number of stickers that outline pretty much every feature and specification that we looked at already.

Moving around the power supply to the rear of the unit shows a small vent along the top of the unit and the stalk where the cables come out of the power supply.

The cables exit the power supply housing in naked form and are securely tied off by way of a cable tie. Shortly after exiting the power supply, the cables are sleeved with a black mesh. The cable sleaving is held in place with neatly finished heat shrink on each and every cable.

This is our first look at the entire length of the cables and it is obvious that this power supply isn't your normal power supply. The shorter cables are sleeved from head to toe except after the first connector in the case of the multiple connector cables.

Here is the complete array of cables laid out for your viewing pleasure. The heat shrink on this end of the cables is very well done and there is just enough cable left at the end for easy manipulation if tight bends are required at connectors.

Here are some nice close-ups of the various connectors on this Element 500W power supply. It was curious to see only a single cable with two SATA power connections but when you think about it, how many m-ATX cases have more than two hard drive mounts?

The main motherboard connector is clearly a 20/24-pin connection sporting the detachable 4 pins on the left of the 20-pin bank. I like this type of 20/24-pin design because then I am not fumbling with the extra 4-pins when plugging the connection in. With the clip, the 4-pins stay put and make this connector feel like a solid 24-pin piece.

The 8-pin CPU connector uses the same clip style and again, I endorse this style. I noted in the specifications section that each side of this 8-pin connection draws from both +12v rails. You can sort of see the two different yellow wires going to each side.

The last of the images we will look at before digging into this power supply is of the fan. From here we can see that it is clearly a 120mm fan and appears to be produced by ADDA. I haven't had good luck with my higher speed ADDA 120mm fans that came with the Asetek WaterChill setup but I am sure this is a completely different model and should serve well in this purpose of low noise.

Once I opened the power supply, the familiar ADDA fan sticker was revealed and these are the specifications I dug up from the ADDA web site:
Model #: AD1212HS-A71GL
Bearing Type: Sleeve bearing
Volts: 12v
Current: 0.44A
Power: 5.28W
Speed: 220RPM
Airflow: 85.2CFM
Pressure: 0.136 (Square Inches)
Noise : 39.1dB/A
Weight: 158 1g
Safety Approvals: UL,CUL,TUV,CE
Page 5 : Interior
The shell for the PSU opened rather easily with just the removal of four screws and if the manufacturer of this power supply wasn't apparent from the exterior and sticker arrangement, the interior gave it away immediately.

Before I actually talk about the interior components of this 500W Element, I thought I would show the exit point of the wires from the power supply. We saw on the exterior that a single cable tie held the cables to a hook on the lower side of the opening and here on the inside, we see the same thing but the cable tie is secured to a hook near the top of the opening. This type of setup is quite simple yet very effective at holding the cable stack in place.

Following the cables down towards the PCB, we come into contact with a couple Teapo capacitors. Now Teapo isn't the best in the business but they aren't the worst either.

The second type of capacitor seen here is a Su-Scon and if you do a quick search for that brand, you will immediately find references to Enhance power supplies. This is the first of many signs that we are looking at an Enhance power supply. I don't really have much information about these Su-Scon capacitors though so they aren't going to be one of the best.

I have quickly flipped over to the other side of the power supply to see what the main capacitors were going to be and as we can see here, the large primary capacitor is again, Teapo. You can also see here the three different black heatsinks sitting above the components, this is another dead giveaway that this power supply is a re-branded Enhance unit.

The power input and on/off switch area appears to have some sort of active electro-magnetic filtering in place. This should help in providing silent operation free from buzzing and such.

The last of the obvious clues that indicate that this power supply is indeed an Enhance unit is the label on the transformers. This main transformer is labeled RD-TM259. If you were to punch that part number into Google, you would again find numerous references to Enhance 400w and 500w power supplies.

This Champion Microelectronic Corp. IC is part of the PFC and PWM circuits doing double duty.

The Weltrend WT7517 IC shown here is responsible for the Over-voltage and Under-Voltage protection and monitors all three voltage inputs (3.3V, 5V, 12V).

There were no other components I could get a good look at so I will wrap up the interior look with a full-view overhead shot of the power supply. The heatsinks are plentiful and cooling for this power supply should be more than adequate with the 120mm fan blowing over the entire surface area.
Page 6 : Installation
For the installation section, I will be utilizing the SilverStone TJ-08 that I reviewed some time ago. This m-ATX case is the perfect candidate for the Element 500W Short Cable Edition.

As you can see, to make things interesting, I decided to do the install of the power supply after all other components were installed already. In the above image I have simply secured the power supply to the case and have all the cables hanging loose. Notice how the majority of the cables don't even touch the bottom of this case.

With the supplied black screws, I wish even more that SilverStone had painted the rear panel of this case black. That would really have finished off the all black look back here. The power supply is standard size so everything fits just as it should which I fully expected.

The first cable I will route and connect is the 4-pin +12v CPU power connector. Before doing that though, I had to disconnect the two ends as this motherboard uses only 4-pins. You can see the little clips here that hold the two halves together.

The cable was just long enough to snake around the CPU cooler around the base and plug into the motherboard connection. This is about the furthest that a 4/8-pin CPU connector is going to be away from the top of the case so this cable appears to be the perfect length.

The next two cables I checked were the 6-Pin PCI-E connectors. I don't have a video card in this system and I don't even have a video card that requires the 6-pin connector to test fit but you can see that the length of these cables would be plenty to reach to the lower portion of the motherboard. This is when it occurred to me, this Short Cable Edition power supply is designed for m-ATX setups…how many m-ATX motherboards are SLI capable? Perhaps two 6-Pin PCI-E cables are supplied in case you are using an 8800GTX.

The next step is to simply connect the accessories up with 4-Pin molex connections. These included the optical drive up top and hard drive below. The rest of the cables, including the 6-Pin PCI-E cables, were easily tucked into the available space under the optical drive.

The short cables of this power supply allowed me a ridiculously easy setup that turned out very, very clean. I have wired this case with a couple regular power supplies and the cables were manageable but no where near as easy to manage as the short cables on this Element 500W. From this side view, you can barely even see any power cables except where they exit from the PSU.

From the backside of the case, we can see the one 4-Pin molex connection coming around the bend to power the fan connectors and we also see the route of the 24-Pin main ATX power connector. It simply loops down behind the drive cage and plugs into the motherboard. There is a tight spot there for the cable to plug in and the bend is quite sharp. The 24-pin connection took some coaxing but I was eventually able to make the bend it needed right at the connector. Despite having the sleaving end at the perfect spot for a tight bend like this, the cables were very stiff and made this a bit of a chore.

Here is one more shot of the power supply sitting in the case. As I have said, it is standard size so it will fit in any case and as you can see, even in a small m-ATX case such as the SilverStone TJ-08, there is plenty of room in-between the PSU and the rear of the optical drive bays.
Overall, installation in this cramped case with the components already inside went very smoothly. The 24-Pin connection was a bit stiffer than I would have liked but that was easily remedied. The short length of these cables are really beneficial to a clean case and make cable management a breeze. It has been a while since a power supply install was that easy in an m-ATX case for me.
Page 7 : Performance
To test power supplies, I like to put them through a one month torture test. For this SilverStone 500W Element, I will be using it to run my AM2 benching rig for four weeks. During this four week period, this setup will see everything from 3D testing, to endless days of Prime95 torture testing, and everything in-between. Here is a photo of what the setup will look like throughout the testing period.

As you can see, the CPU is being cooled by water and there are a number of 120mm fans cooling the memory and motherboard as well. Here is a complete list of hardware being powered by the SilverStone 500W Element:
CPU Cooling: Asetek WaterChill Xtreme
MB: DFI LanParty NF590 SLI-M2R/G
RAM: Various 2GB kits throughout the test period
GPU: Biostar 7300GT 256MB DDRIII
HD: Seagate SATAII 80GB 8MB NCQ
OS: Windows XP SP2 (with all updates)
FAN: 2x120mm Vantec Stealth / 3x120mm ADDA AD1212MS-A73GL
CASE: Open bench setup
Power Supply:
Silverstone Element 500W (ST50EF-PLUS Short Cable Edition)
4-Pin CPU +12v1

Because the 8-Pin EPS CPU power connector is actually two separate 4-Pin connectors that are supplied by the two different +12v rails, I have taken measurements from both connectors and labeled the graphs accordingly. The above graph is for the 4-Pin connector supplied by the +12v1 rail and the graph below is for the 4-Pin side supplied by the +12v2 rail.
4-Pin CPU +12v2

Both connectors show extremely steady voltage throughout the testing period with very little voltage drop going from idle to full load. The other thing to note is that the voltage drop doesn't increase or decrease from day 1 to day 28. This means the power supply never got weaker over the month that it was tortured. All the readings I took were very similar on these connectors throughout the 4 weeks. These graphs are a good representation of what kind of voltage was being supplied to these two connectors. I will also note that some people will think these readings are bad because they are below 12.00v, but that is not true. Power supplies have a +/-5% range and as long as they are operating in that range, then they are perfectly fine.
4-Pin Molex

I took the 4-Pin Molex reading from the connector that was powering the Asetek WaterChill Xtreme [12V] Pump/Reservoir. The +5v readings are rock solid and the +12v1 readings are just as solid. Keep in mind this connector is powered from the same +12v1 rail that the first 4-Pin CPU connector is powered by above and the numbers here are pretty much identical to above.
24-Pin ATX MB

The last of the connectors I measured during the testing period was the 24-Pin ATX motherboard connector. I measured all three rails as you can see here and we have pretty much the same results as the other charts. The +12v1 rail is just slightly under the 12.00v point but it remains a constant 11.95v under load and about 11.97v at idle. I wish I had a video card to two that required the 6-Pin PCI-E connector for the testing as well but I don't. That would have put a bit more load on this power supply but as it stands, this SilverStone Element 500W seems to be a pretty solid little unit. Keep in mind, this power supply ran this system which was at 100% load for four weeks straight with very few breaks.

The last thing I want to mention here is the power supply noise, and the fan noise. During the testing I did notice the tiniest of tiny buzzing noise coming from the unit. This would only show up once in a while and would go away after a short time. I could only hear it when my ear was pointed at the unit and less than a couple feet away. With the power supply in a case, there was no chance of hearing the buzzing. This buzzing was not the only noise that could be heard from the power supply.
The 120mm fan also made a low whining sound at idle, almost as if it didn't like being run at the RPM it was spinning at. Again, this noise was only audible in a completely silent room with your ear within a couple of feet from the unit. After a few hours of load the fan seemed to spin up a bit and that whining noise all but went away. Again, this indicates that the fan was not suited well for the really low RPMs and at a little bit higher RPM, the power supply actually got marginally quieter. If I had to rate this power supply for noise, I would probably give it an 8/10. Since this type of power supply is designed for m-ATX or HTPC systems, a completely silent power supply is ideal and the slight whining from the fan may be heard in some environments, but not many. Sound is such an objective subject but I thought it was worth mentioning.
Page 8 : Conclusion
The SilverStone Element 500W (SCE) is an interesting power supply. It is designed for a very specific market and will only be beneficial to those who are running m-ATX or HTPC cases. The short cables are definitely something that should have been done a long time ago and I think SilverStone has done a good job with this idea. With that said, there are a couple things to consider.

I have taken the time to measure the cable length for readers in hopes that it aids in your purchasing decision because you will want to make sure that the shorter cables are not too short for your application. I also found the cables to be a little bit stiff at the ends so you may have to really work them in some tight corner situations. The fan noise is the only other minor set-back with this power supply. The Element is still quieter than any generic power supply and most brand name units you will find but it isn't completely silent.
Overall though, I am very pleased with the SilverStone Element 500W (SCE). The voltage on all of the rails were extremely good, even in a heavily overclocked and power hungry system. There also seemed to be no degradation in voltage regulation throughout the 4 week load testing period. If you are running an m-ATX or HTPC system and would like to easily rid yourself of a cabling nightmare, definitely consider the SilverStone Element 500w (SCE). It is a unique idea and has been implemented very nicely by SilverStone.
Advantages
One of a kind, can't think of another power supply like it
Cable lengths seem to be almost perfect for their application
Extremely strong power supply that can handle heavy systems
Disadvantages
That miniscule fan noise may be audible in some systems
I would have liked slightly softer cable ends for easier manipulation
Overclockers Online would like to thank SilverStone for making this review possible.