Thermaltake Mozart Media LAB
Jun 1st, 2006 | By Archive
Thermaltake Mozart Media LAB
Date
: 06/1/06 – 04:02:04 PM
Author
:
Category
: Cases
Page 1 : Index
Manufacturer:
Thermaltake Technology Inc.
Price:
$119.99 (Case) + $85.99 (Media LAB) = $205.98
Thermaltake is known for being a major player in the cooling, cases, and power supply markets, among others. Founded in 1999 with a net capital of $10 million, Thermaltake's net capital stands at over $350 million today; if that is not enough evidence of the company's importance and role in today's computer market, ask any hardcore enthusiast or overclocker what air cooler they are using… more often than not, it is going to be Thermaltake's Big Typhoon.
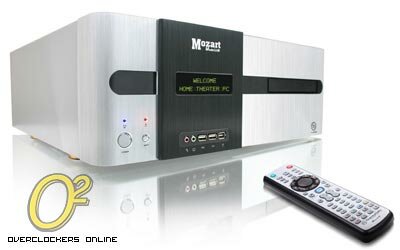
Anyway, Thermaltake has provided us with a case for review: the
Mozart
. Not only that, they have also included their very own
Media LAB
, a product that hopes to entrench the Mozart in the home-theater PC (HTPC) niche.
Page 2 : Package & Contents
The Mozart comes in an attractive box, complete with color graphics and a carrying handle.
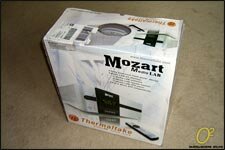
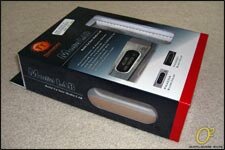
The front shows a picture of the case. It is an aluminum HTPC style case, similar to those old desktop or workstation computers upon which monitors were often placed, supporting ATX and mATX motherboards. The package lists an optional Media LAB kit consisting of a remote, software, and a vacuum fluorescent display panel (VFD) which has its own place in the case's front.
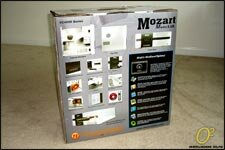
The back of the package shows many previews of the case with several detailed and captioned pictures. There is also a box dedicated to the optional Media LAB's features, which we will explore later on in the review.
The sides of the case's box are identical and show basic information such as serial number, UPC, and the like. Also, it is made clear that neither the VFD panel nor a power supply are included as part of the case's packaging.
The Media LAB kit came independent of the case's package.
Both the VFD panel, which can fit in either a 5.25" bay or within its reserved area in the Mozart, and the remote, are visible through the box.
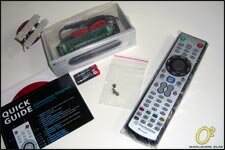
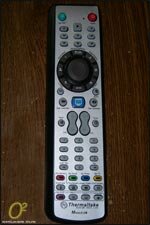
Everything needed for the Media LAB is included: a 20-pin to 24-pin adaptor with 3-pin power cable, the Media LAB VFD mounted in a 5.25" holder, a manual and quick setup guide, CD with software, two AA batteries for the remote, a few screws, and the remote itself.
Opening up the case's package, we immediately find something many other manufacturers don't often include with their cases: a manual.
Let's take a quick look at the specifications and features before getting at the case itself.
Page 3 : Specifications & Features
Thermaltake's webpage for the Mozart has a great deal of information including manuals, software, and more.
First we have the features:
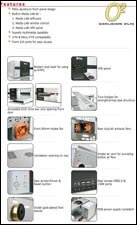
Once again, the HTPC theme is evident with the VFD panel receiving emphasis. On the cooling forefront, there are three fans and ventilation grills. The front has large power and reset buttons accompanied by audio, USB, and 1394 ports.
The Media LAB specifications:
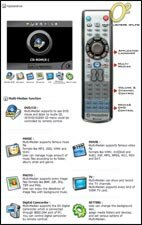
There are numerous features associated with the remote which can be configured via the software.
And last but not least, the case's specifications:
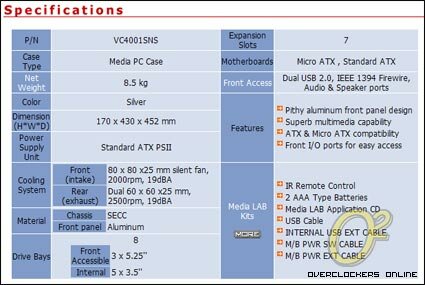
The case is quite heavy at 8.5 kilograms, approximately 18.75 pounds, probably due to it being constructed out of aluminum. From the other specifications, we can see that the case is basically equivalent to a normal mid-tower case given the expansion slots, etc.
Now that we know the specifications, let's take a look at the Mozart.
Page 4 : Exterior
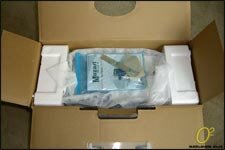
Putting the manual aside, we catch a glimpse of the case protected by a foamy cover.
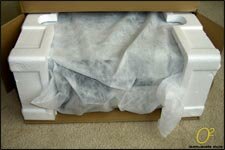
After pulling the case out, we can see that it is extremely well packed thanks to two styrofoam blocks placed along the sides.
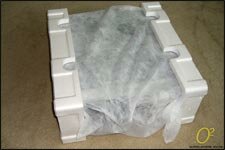
Remove the blocks and the foamy cover and the case reveals itself!
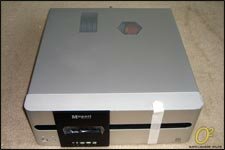
The top features ventilation grills; a rectangular one for the video card and a hexagonal one for the CPU cooler.
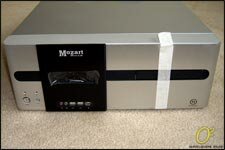
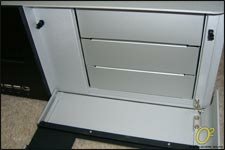
Taking a closer look at the front, we see from left to right: the power button, the reset button, the Mozart Media LAB emblem, the VFD panel area covered in plastic, and the front panel ports. Further to the right is the flip-out panel housing the 5.25" bays. The middle bay drive can be used without opening the panel thanks to the black faceplate-like object which Thermaltake calls a "H-bar".
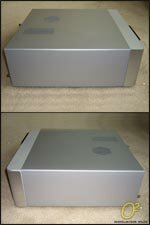
I would expect some sort of ventilation grill along the sides but, unfortunately, the Mozart does not have any. As compensation, the metal finish is very smooth.
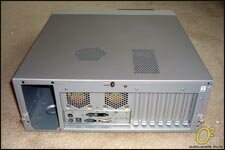
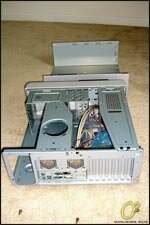
Looking at the case's rear, there are the usual characters: space for the power supply, a couple of fans, an I/O panel, and seven expansion slots. The top cover has been secured with three thumbscrews for easy removal.

The bottom of the case has nothing striking, just four rubberized feet with a golden trim; this is a welcome change from the generic plastic feet found on many cases.
That concludes the tour of the exterior. Let's open up the case and see what's in store for us.
Page 5 : Interior
Removing the three thumbscrews in the back allows access to the innards of the Mozart.
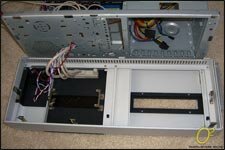
On the left side of the picture are the 5.25" drive bays. To the right of them are the 3.5" hard drive bays. There are two bridges that help support the case; the one on the right also doubles as a hard drive holder. So, the Mozart can accommodate three 5.25" drives and four 3.5" hard drives; however, there is no place to mount a floppy drive as the 3.5" bays are not externally accessible.
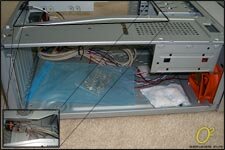
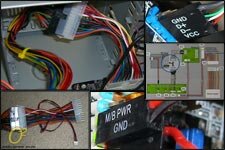
All the cables come neatly tied and the screws can be found in a blue bag.

Remove a couple of screws and the bridges can be swung out. All the fans, in authentic Thermaltake colors of orange and black, are visible. Note that only one standoff is installed by default in the case and there is no removable motherboard tray of any sort. Of particular interest, especially since I've never seen one before, is the chassis intrusion detector found along the back side of the case.
I believe it's now time to populate this interior with components.
Page 6 : Physical Installation
The included manual assisted me greatly in installation. However, there are some quirks that I had to discover myself.
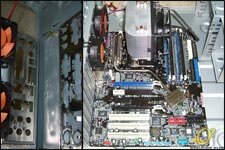
Since I've been so used to a removable motherboard tray, it was kind of a shock to find out that I had to install everything into the case itself rather than do it outside first.
No matter, I popped out the Mozart's I/O shield and installed the one that came with my Asus A8N-SLI Premium; sometimes I wonder why case manufacturers even include an I/O shield as most motherboards have different port layouts anyway and include their own I/O shields.
Anyway, I then installed enough of the included bronze standoffs in the appropriate places so that they would line up with the screw holes in my motherboard. After that, having already set up the motherboard with the CPU, cooler, and memory, I gently placed the motherboard into the case, lining it up with the standoffs.
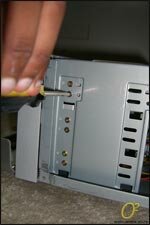
At this point, I installed the Media LAB. To do so, I had to pop out the front panel which was held in place by clips on either side and beneath the case.
I then screwed in the VFD panel into the appropriate area; those without a Thermaltake Media series case will have to screw it into the 5.25" holder that comes with the VFD panel and place it into a 5.25" bay.
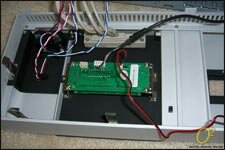
Connect a few cables and you're all set! These cables include the 24-pin adaptor that has a special power cable that draws standby power from the motherboard, a cable that connects to the case's power switch, a cable that connects to the motherboard's power-on header, and a USB cable for interfacing with the PC.
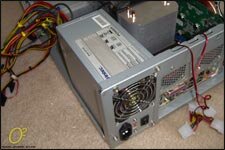
I then installed the power supply and video card without a hitch. To install the video card, I had to pop out one of the expansion slot protectors.
Continuing with installing the other components in the case, I installed the 5.25" drives. To do so, I unscrewed the metal plates that cover the bays. Then, I slid the top drive in from the outside and secured it.
For the middle drive, I attached the included sticky tape on the drive's door and then placed the aluminum H-bar on it so that it lined up with the hole in the front panel.
I could not install the hard drives in the middle 3.5" bay because it interfered with my full size ATX motherboard; those with mATX motherboards may be able to fit hard drives there. Therefore, I had to install my RAID array consisting of two drives, in the right side bridge. They are secured by normal screws.

Connect everything, including the case's front panel connectors, the fans, etc. and that's it! Or so I thought… until I tried to secure the bridges back to their normal positions. The hard drive bridge closed without any problem but the other bridge hit the heatpipes of my Arctic Cooling Freezer 64 Pro!

I should have anticipated this earlier but the case cannot accommodate "tall" tower-type coolers! Therefore, I had to switch back to my stock AMD cooler in order to continue with testing.
Next step is software installation for the Media LAB.
Page 7 : Software Installation (Media LAB)
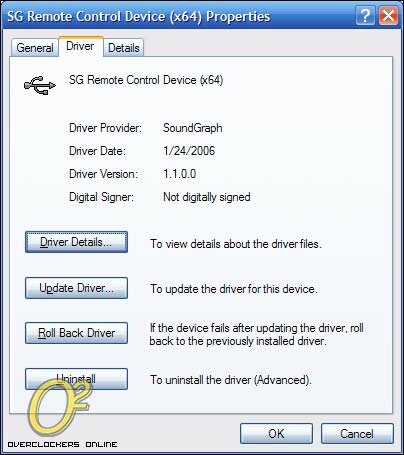
I encountered some slight difficulty because the drivers on the CD do not support 64-bit versions of Windows. I found the correct drivers after much searching on the website of Soundgraph, the company who makes the Media LAB for Thermaltake.
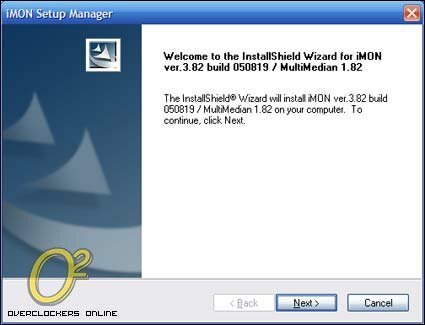
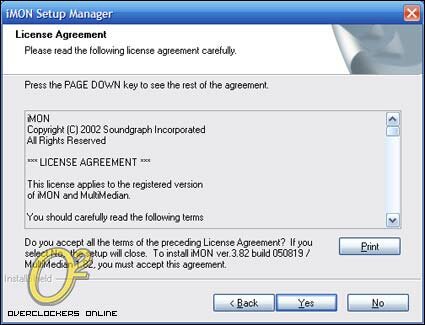
After installing the driver for the USB device, I proceeded with installing the software: iMON and MultiMedian.


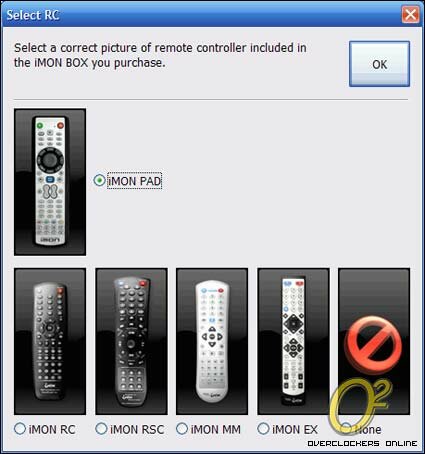
After that, it was smooth sailing. The software detected everything and even set up the remote. Most of the functions of the remote are exclusive to playback of video, etc.; the remote worked fine with Winamp and Windows Media Player. You can even use the remote as a mouse thanks to the directional pad!
Most of the features are, of course, suited for HTPC use and I could not really test them to the fullest extent. I did, however, test the power button, the media control buttons, volume buttons, and the special "My" buttons at the bottom and they all work fine. The "My" buttons open the MultiMedian software; however, I could not go past opening the software because the program would just freeze – x64 compatibility issues?
The VFD display panel is fully tweakable and is capable of displaying all sorts of things. They can be configured through the iMON VFD Control Panel software. Though aesthetically pleasing, the VFD display is not very practical; however, it is intertwined with and is essential to the remote control's functions. It displays all sorts of things including, but not limited to, a graphic equalizer, system information, media information, an e-mail check, daily news, city information, and more.
For example, here is the Media LAB showing what song I was listening to on Winamp, "What You Know" by T.I.:

At this point, let us once again take a look at the case itself and its performance.
Page 8 : Testing
CPU: AMD Athlon 64 3000+ Venice 1.8GHz w/ stock cooler
Motherboard: Asus A8N-SLI Premium
Memory: Corsair ValueSelect DDR400 (PC3200) 1GB dual channel kit (2x512MB)
Storage: 2x Hitachi Deskstar 80GB SATAII in RAID0 configuration
Optical: LG DVD/CD-RW, NEC DVD±RW
Video Card: eVGA e-GeForce 6600GT PCI-E x16 w/ Zalman VF900-Cu
OS: Windows XP Professional x64 Edition
Cases:
- Aspire X-Dreamer II
- Thermaltake Mozart Media LAB
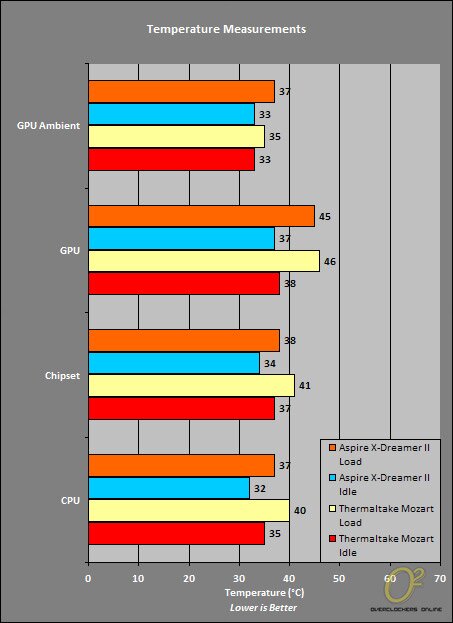
From the temperature data, we can see that the Mozart's cramped space makes it slightly less optimized when it comes to airflow as seen by the higher temperatures. Only the GPU temperature measurements were to the Mozart's advantage, possibly due to its ventilation grill. However, the Aspire X-Dreamer II's sheer spaciousness and ability to accommodate more powerful fans allows it to win over the Mozart. However, the Mozart is many times quieter than the X-Dreamer II; my room actually sounds less like a tornado now!
Page 9 : Conclusion
All things considered, Thermaltake's Mozart is a great case but not without its faults.
Aesthetically speaking, the Mozart is a beauty. It's classic and refined looks will complement any venue, whether it be your room or your entertainment center. Speaking of entertainment centers, the Mozart is built as an HTPC case; the Media LAB can be used to control it just like you would control a piece of audio equipment, for example. Also, the case is quiet and pleasing to the ear – no wonder it's named Mozart, it sounds pleasant like the famous composer's music!
Inside the case, however, is another story. It is quite cramped, especially when using a full size ATX motherboard. Cable management is a pain, even though you can't see the inside via a window or anything. Also, functionality is slightly impaired due to the lack of a floppy drive bay if required.
Altogether, the Thermaltake Mozart Media LAB is a perfect candidate for HTPC use considering you can pay the price premium of over $200. I highly recommend this case, a mid-tower disguised as a HTPC!
Advantages:
Excellent build quality
Beautiful, refined looks
Optimized for HTPC use (Media LAB)
Hinged front panel door, 1 drive accessible without having to open door
Quiet, good airflow for a HTPC form factor case
Disadvantages:
Slightly cramped for space, especially with an ATX motherboard
No externally accessible floppy drive
Cannot accommodate "tall" tower-type coolers
Expensive
Much thanks to Thermaltake USA for providing the Mozart for review!