Samsung 940B
Oct 2nd, 2005 | By Archive
Samsung 940B
Date
: 10/3/05 – 12:59:00 AM
Author
:
Category
: Monitors
Page 1 : Index
Manufacturer:
Samsung Canada
Price:
$386 (USD)
This will be my first Samsung review but certainly not the first for us here at O². Simon just finished up a review of the Samsung 915N not long ago and we have had a few others come through in the past year. I currently am running a 19" Samsung CRT for my photo editing and have a Samsung TV in my living room so I am not a stranger to this leading manufacturer of display products. Their massive lineup of LCD, CRT, and Plasma displays has something for everyones needs, today I will be looking at the SyncMaster 940B 19" LCD monitor.
As I mentioned Samsung has a massive line up when it comes to monitors and their LCD selection is as vast as any other manufacturer. There doesn't seem to be an end to the available models and the specifications that go along with them. The SyncMaster 940B that I will be looking at today is a 19" 1280×1024 8ms digital and analog LCD monitor that is big, sleek, and refined to the point that it is just sexy.
Page 2 : Package
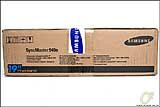
There were no surprises when the 940B showed up in its standard brown retail package having read Simons reviews of other Samsung monitors. As with the previous ones before it, this model showed up without the slightest hint of a shipping journey.
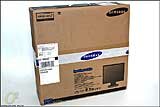
Pretty standard stuff here, a small image in one corner with some specifications near it and a couple logos making sure you know that a Samsung product is inside.
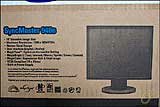
Here is a close up of the specifications listed on one of the top flaps. All the important stuff is listed here as well as the accompanying logos that outline what the capabilities of the monitor are.
Not a lot of flash to show off here with a brown box package so this is as flashy as the box gets. Really though, a flashy package is not at all necessary and I commend Samsung for keeping it simple and making the product as cheap as possible. They leave the best for what's inside and that is the way it should be. As we normally do here at Overclockers Online, we will have a look at the complete specifications and then open this package up and examine the beauty within.
Page 3 : Specifications
Time for the obligatory chart of specifications most people don't even understand. This was pulled from Samsungs web site.
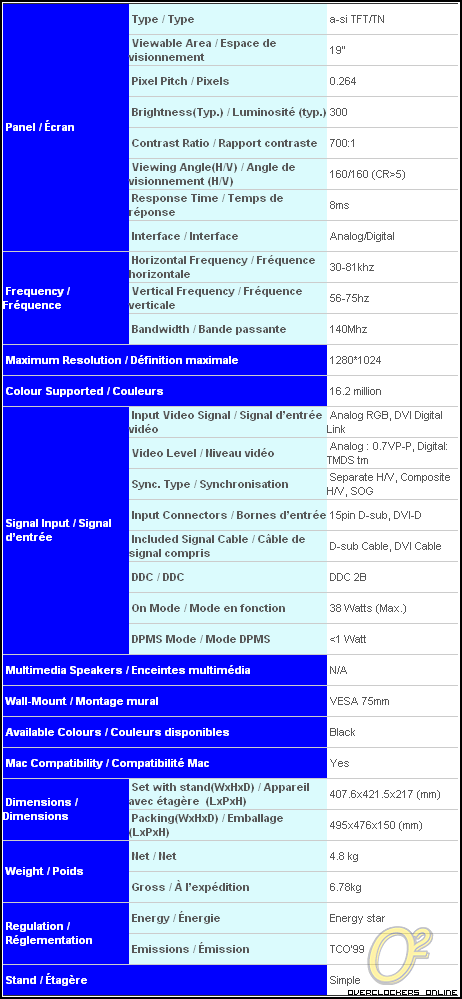
If you don't want to try and filter out the specifications you are looking for, here are the main points that I think Samsung would want to conveyed about this particular monitor…
Maximum Resolution: 1280 x 1024@75Hz
Contrast Ratio: 700:1
Viewing Angle (H/V): 160/160
Response Time 8ms
Pixel Pitch: 0.264
Dual Interface (Digital/Analog)
MagicTune / MagicBright II / MagicColor
Built-in Power Supply
Page 4 : Package Contents
A small incision into the sealing tape and I am inside without any effort.

As economical as it gets as far as packing goes and with the small box, it was quite expected. Everything is secure in its place certain to not get damaged or damage other pieces.
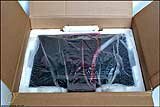
Once I remove the loose parts and upper styrofoam panel the monitor itself is revealed. Wrapped in protective plastic and laying face down into a bed of styrofoam, the only way the screen could get damaged is for the bottom of the box to be punctured right through.
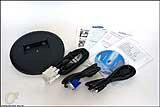
I removed all the loose parts from their various bags and packages and spread them out to have a look at. There is not a lot here and there doesn't need to be. An analog RGB cable as well as a digital DVI link are of course included along with the power cable. Notice no adapter or in-line converter, Samsung prefers to have that built in to the monitor and thankfully so. The paperwork is just the registration card, warranty information, and installation guide. Of course, the monitor has to come with a stand and the base of that stand, seen here, will need to be installed.
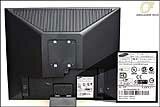
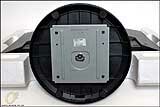
I have removed the rear cover to show the VESA mounting screw holes right in the middle of the monitor. The four cutout squares are for holding the rear panel on, and the screw holes around the squares are for the optional VESA wall mount. At the bottom in the middle, we can see the three screws which hold the stand on that comes attached out of the box. To the right of that is just the sticker with model number and safety standards that the monitor has passed.
The rear cover is back on and just to the right of that is a small cutout for a lock, should you not trust those that have access to your monitor. I would be willing to put my money on motion sensitive alarms with two-way pagers on monitors if they get any bigger and more expensive, you heard it here first at Overclockers Online.
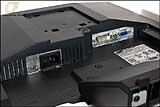
Here is a nice close up of the rear of the monitor with the rear panel removed again. You can see a standard power inlet so if you lose the included cable you won't have to worry about buying an expensive replacement. On the right are the DVI and analog connections. I think laying the monitor flat like this for connecting those cables will make life much easier.
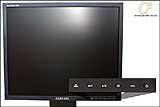
Here it is, our first look at the front of this sleek and sexy monitor. The bezel is thin, plain and perfect. The model number is in the top left and the standard Samsung brand at the bottom middle. In the lower right are the almost perfect buttons. They really fit the style of the monitor well and blend into the bezel just the right amount. From left to right they are the menu, adjustment, digital to analog, auto selection, and power buttons. You will notice no LED is immediately present so it will be interesting to see what indicates power.
Page 5 : Installation
Setting up the monitor base is fairly simple and with the supplied instructions, a twelve year old should be able to set it up in a couple of minutes.


With these two photos it is pretty self explanatory. Just slide the two tabs into the holes in the base and push the base completely on.
Then we just have to lift the tab on the screw and turn it in the locking direction to secure the base. Once its secured just flip the tab flat and we're ready to go.

With the base secured the last thing to connect were the two cables. I will be using the DVI connection as my CRT will be on the Analog connection of the Sapphire X700 Pro that I will be using to test the monitor. To connect these cables, it is easier to have the monitor lying flat.

After the cables are connected, you can pop the rear panel back in place. You can see how the opening gives plenty of room for the cables to come out in any direction and keeps the rear of the monitor nice and clean.
The first thing I checked for before doing anything else was to see if the monitor came out of the box with any dead or stuck pixels and it didn't.
As with most monitors, drivers and software are not required but with LCD monitors it is highly recommended and with the Samsung LCD monitors they supply excellent software for setting up and calibrating the color and brightness of the monitor. Simon did a very good job in showing the screen shots of the programs so I won't duplicate his review. You can view these in the Samsung 915N review. Instead I will provide some photos of the on-screen display used for adjusting the monitor.

To get to the menu, the menu button is pushed. The next two buttons on the face are simply up/down arrows which are used to navigate through the options. They also double as a quick way of adjusting the MagicBright setting and Brightness when not in a menu. The fourth button is used to make a selection when in the menus. The navigation comes quite natural and I found I could zip through the menus within a few minutes.

This menu option is for the color and gamma control as well as the feature at the top called MagicColor.

This allows you to specify a certain portion of the monitor to different color and brightness settings for photo viewing as an example. Here is a screen shot with a small box setup up to a higher brightness.

You can clearly see in the upper left hand corner I have adjusted a small box that shows a much brighter picture. There are various options for size including half of the screen and user selectable.

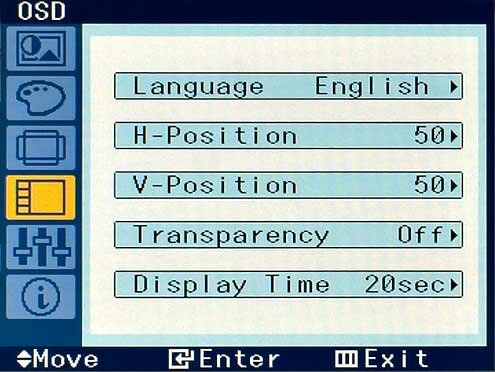
This menu option is for adjusting the actual On Screen Display that we are looking at. You can move it anywhere on the screen, change the language, and set a transparency level as well as the time that the display stays when inactive. The default is 20 seconds.
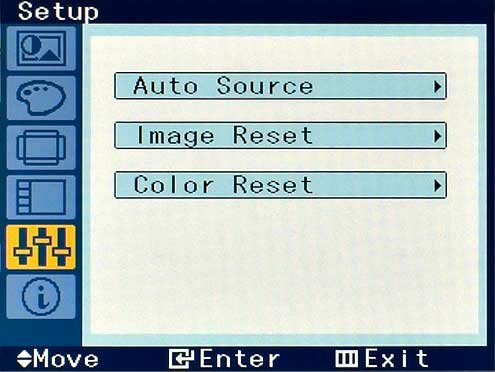
The second last menu option is for resetting any changes to the default settings and giving you the option to let the monitor switch automatically between the DVI and Analog sources. By default it is set to manual, forcing you to choose between Analog and DVI sources by way of the button on the front bezel.
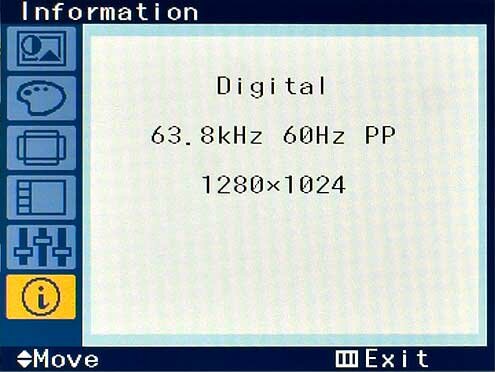
This final menu screen lets the user know the input source, vertical and horizontal frequency, and screen resolution.
Page 6 : Performance & Testing
I will start off by mentioning that I am a content creation computer user. The more the pixels the better and a minimum of 1600×1200 is my standard. When I first got the SyncMaster 940B, I was a bit hesitant to review it because Of the resolution. I can't even remember the last time I had a monitor set to anything smaller than 1600×1200 except for gaming. For the photos below, both monitors were set to 1280×1024.
The MagicTune software for adjusting color, contrast, and brightness that Samsung offers is wonderful in getting the monitor setup to where it fits the needs of the user. I was almost able to get the screen to the point that it looked very similar to my 19" CRT monitor I use for digital photo processing.

This obviously is just a photo taken of the image on both screens with my camera so it's not the best representation but it gets the point across. The LCD monitor always just came up with more contrast and brightness than the CRT. If you start out with an LCD then this would be fine but coming from years of photo processing on a CRT monitor, the adjustment was hard. When I printed the images, a number of them were off in color that I edited on the LCD but very close most of the time. I guess this just proves that you can't teach an old dog new tricks.
I not only used the monitor for the photo processing but everything else you can imagine. I read my email and did all my internet browsing on this monitor for a full month and was really impressed. With the monitor setup how I like it, my eyes had no problem adjusting to the LCD and after hours on end of staring at it they never once became fatigued.

The added brightness and contrast really make these tasks more enjoyable and easier in some cases when it came to reading dark text on dark backgrounds and certain web sites, like Overclockers Online for instance. Obviously these two monitors are not the exact same size as the LCD seems to be taller therefore more square. Not only did I do everyday tasks and run basic office applications on the 940B, I also put the 8ms response time to the test with a little gaming.
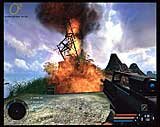
These screenshots were taken with the Sapphire X700Pro with no AA or AF turned on.

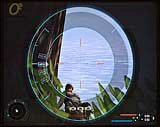
There was no ghosting or streaking at all even under the hairiest of conditions that I could see but if you look closely, the camera caught it. This shot was taken at 1/250 second and it picked up a slight ghost, but when playing I definitely didn't see it. I was actually quite surprised to see the ghost in the image because I never noticed anything of the sort in about 20 hours of gaming I did on this monitor.
I admit I am not the biggest gamer out there and Far Cry is my choice of first person shooter, so that is all the screen shots you will catch me posting. I did not notice a single difference going from the CRT to the LCD monitor. The image is plenty crisp and sharp for 1280×1024 and again the brightness and contrast really makes the game look great.
The last image I will be sharing today is that of the movie Snatch. When watching movies on this monitor they looked really sharp.
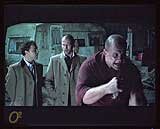
Again, like gaming, there was no ghosting that the human eye could see and a completely streak free image thanks to the 8ms response time. I tired a bunch of different movies but I just couldn't get a fast enough shutter to try and catch a ghost, instead I just get blurring as seen here. This of course is not visible when watching on the monitor but is just the effects of too slow a shutter speed with the camera. The sharpness of this monitor is even visible in this photo. Just look at the depth of the image. the Two guys talking seem to jump off the screen, almost like the background is a painted set. This is even more prominent when actually watching the movies and it gives the movie that much more life.
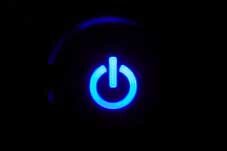
I almost forgot to show off the smooth blue power light that illuminates the power button. It just blends in so well you barely notice it.
Page 7 : Conclusion
The past four weeks with this monitor have gone by extremely fast as the hardware just hasn't stopped coming in giving me plenty to do. I primarily used this monitor as a second monitor that contained my web browsing window as well as my email window. I have really grown to love the brightness, contrast, and sharp text that it offers. Moving these two windows back over to my CRT just doesn't do it for me anymore. This I almost expected, what came as a surprise was when I fired up Far Cry on my CRT again. The Samsung SyncMaster 940B has been spoiling me with the ultra rich colors it offers and it just doesn't seem as fun as it does on the 940B. I am also happy to say that there were no dead or stuck pixels when I finished this review just as there wasn't when I started it.
As noted in the performance section, there wasn't a single time I noticed a ghost or streak in well over 20 hours of gaming and about 5 full length movies that I managed to watch on this monitor. I honestly can't ask for anything else from a monitor than what the 940B offered. Not once did my eyes ever fatigue even after long 24 hour sessions in front of the screen reading text and the adjustments you can make to the screen just never seems to end. Custom tailoring the brightness, contrast, and colors was simple and the software walked me right through it. At a price of under $400 USD, this huge 19" monitor is definitely something that will please every user no matter what your focus is, gaming or office. It will also look fabulous on any desk, and twice as good when doubled up side by side.
Advantages
- Very well priced
- 8ms at a huge 19" is wonderful
- Analog or Digital interface
Disadvantages
- 1600×1200 on 19" would really be nice to see
Overclockers Online would like to thank Samsung for providing this sample for review.