Zalman Reserator XT
Oct 22nd, 2007 | By Archive
Zalman Reserator XT
Date
: 10/22/07 – 05:25:25 AM
Author
:
Category
: Cooling
Page 1 : Index
Manufacturer:
Zalman
Price:
$399.99 Shopzilla
Zalman is a name that should be familiar to any computer enthusiast, especially anyone looking for silent cooling solutions. Zalman has long been a leader in silent cooling solutions, in both passive and active cooling variations. While Zalman first came onto the scene with various air cooling solutions, since water cooling has increasingly become more popular each year, Zalman has delved into the water cooling market.
Zalman released the first Reserator back in 2005. After four versions in the series, each improving on its predecessor, today I am taking a look at the latest, the Reserator XT. With the XT, Zalman brings active cooling to the Reserator family of products. Will the Reserator XT remain true to the silent cooling mantra of Zalman while still maintaining solid performance that is the benchmark of their products? Let's move along and find out.
Page 2 : Package
The box for the Reserator XT does not confront you with any flashy graphics or bright colors.

On the front you have a picture of both the titanium and black versions of the Reserator XT on a black background. On the bottom left are a few key features of the watercooling unit.

Moving to the left side we have a more detailed look at the features and specifications of the items included in the box. Zalman has also listed out the product id's and specifications for the optional water blocks for VGA, VGA RAM and northbridge cooling. On this side is the only indication of the color of unit hidden inside, located right above the bar code.

The back of the package is an exact replica of the front of the package.

The right side of the box has a picture of the Reserator XT along with a graphic highlighting various elements of the unit. In the background you can see how a PC might look with all optional water blocks installed. Notice along the top of the box there is a handle, making it easy to carry.
Page 3 : Contents and Specifications Part 1
Now to open up the packaging to see what we have inside.
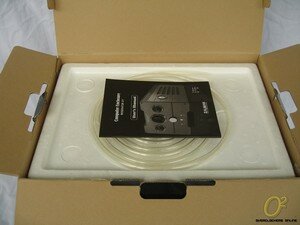
Upon first opening the lid, you have the user's manual and PVC tubing resting together on top of a Styrofoam shell.

Once you remove this first Styrofoam shell you have another layer containing the rest of the accessories along with the CPU water block.

Here we can see all the components, minus the CPU water block and hose, included with the Reserator XT. Starting in the top left and moving down we have the power cord, I/O bracket and hose clamps, power supply jump cable, anti-corrosion coolant mix and degassing tube with quick couplings.

Next I opened up the package containing the CPU water block and pulled out the accessories. We have a user's manual, mounting hardware for just about all of the AMD and Intel CPU socket types. Also included are hose clamps to accommodate hoses with inside diameters of both 8mm and 10mm.

Zalman includes their ZM-WB5 CPU water block with the Reserator XT. The CPU block is made of copper with an aluminum anodized cover to prevent corrosion. You can see the inlet and outlet fittings in the top.

The bottom of the CPU block has a smooth mirror finish. There are opinions in both directions about a mirror finish, but I have seen good results from both a mirror finish and a slightly less polished finish, so differences are negligible at best.
Here is a quick rundown of the ZM-WB5 straight from Zalman's product page:

Page 4 : Contents and Specifications Part 2
We have seen the accompanying hardware, now let us get to the heart of the product, the Reserator XT itself.

Our first clear look at the titanium colored Reserator XT, if nothing else, clean comes to mind. On the front are three gauges; displaying temperature (both ambient and coolant), fan speed and flow rate. There are three buttons below the gauges, one to switch the temperature display between Celsius and Fahrenheit, one to switch control between automatic and manual control and the final is an LED/reset button to reset the alarm or turn the LED lighting on and off. In the center of all this is a rotating knob, used for controlling the volume of the alarm as well as the speed of the fan and pump in manual mode. On the top is the fill hole for the reservoir.

On the right side you can see the circular flow meter. The flow meter serves as a visual indicator that the coolant is flowing properly through the system. If the flow meter stops spinning it sets off an alarm that gives and audible indicator and flashes the front LED's. There are also five long openings that allow for air to be drawn in over the radiator portion of the unit.

On the left side we just have five more openings to allow air circulation to cool the liquid passing through the radiator.

Moving to the back, we have the 140mm fan that acts as the active cooling of the Reserator XT. The fan pulls air through the openings on the sides and exhausts it out the back of the unit. Also note that the entire unit acts as a large passive heatsink, further helping to dissipate heat. On the bottom left and right you have the connections labeled ‘IN’ and ‘OUT’ to indicate the flowing direction of fluid. These couplings use a combination of valves along with the quick disconnect couplings located on degassing tube to prevent the liquid from leaking out of the system. This is a very nice feature, and I would say almost necessary for an external liquid cooling system. On the right side above the ‘OUT’ connection is the outlet for the power adapter that connects to a 4 pin molex from your power supply.
Now a peek at the specifications taken straight from the Reserator XT's product page:
Reserator (Reservoir+Radiator+Water Pump)
1. High Performance Ultra Quiet Water Cooling System
2. Active/Passive Hybrid Cooling Design
– Active Cooling: 140mm Fan (Forced Convection Cooling)
– Passive Cooling: Anodized Aluminum Heatsink Chassis(Natural Convection Cooling)
3. Automatic/Manual Control Modes
– Automatic Mode: Coolant Temperature is monitored for Automatic Control of Fan Speed and Coolant Flow Rate.
– Manual Mode: Front Panel Control Knob allows the user to manually optimize performance and minimize noise
4. Warning & Alarm System
– Coolant Flow Monitoring: Warns the user when coolant flow is problematic.
– Coolant Level Monitoring: Warns the user when the coolant level is low.
5. Comprehensive Visual Monitoring Display
– Coolant Temperature (viewable in ¡ÆC or ¡ÆF)
– Ambient Temperature (viewable in ¡ÆC or ¡ÆF)
– Coolant Level Warning Icon (Lights Up When Coolant Level Is Low)
6. Coolant Flow Rate
– Coolant Flow Indicator
– Light Switch
7. Automatic Power ON/OFF In Sync with the Computer
8. Quick Couplings for Fast, Convenient, and Leak-Free Installation & Maintenance
- Weight : 7kg
- Dimensions : 350(L) x 210(W) x 180(H) mm
- Materials : Anodized Pure Aluminum
- Maximum Coolant Capacity : Max. 1.25l
- Integrated Water Pump : 6W, DC 12V, 300L/Hr
- Maximum Lift : 1.8m
- Color Options : Titanium / Black
Page 5 : Installation
Now that we have gotten acquainted with the newest Reserator, let's see how installation goes.

I started out by mixing the solution with 1 liter of distilled water. I decided to use a glass bowl (note the stylish floral design) to show off the vibrant blue color of the mix. Ok, actually this was the only glass bowl I had available that my wife would let me use.

Following Zalman's instructions I used the coolant mix container and poured 4 container's full into the Reserator XT. This filled the unit pretty close to the top of the reservoir inside the cap.

Next came the initial degassing of the lines. This amounted to connecting the degassing tube as shown and depressing the valve located on the quick disconnect coupling repeatedly with your thumb. This process allows for some of the fluid to partially fill the internal lines of the system and allow for a smooth initial flow, and prevent the flow alarm from sounding.

Next I disconnected the power supply from the motherboard and hard drives and installed the included jumper cable to the black and green pins and connected the 4 pin power connector from the XT to a 4 pin molex connector on the power supply.

With the unit plugged into the power I connected the degassing tube to the ‘IN’ and ‘OUT’ connections on the back. I plugged the power supply back into the wall and flipped the power on and off for ten seconds each time until fluid was solidly in the tube. Then I ran it for about ten minutes ensuring that I no longer saw any air bubbles in the line.

Once degassing was completed, I removed the degassing tube from the Reserator and then removed the couplings from the degassing tube, since these couplings will be used to connect the system when it's installed. This proved to be a little difficult at first until I remember a quick dip in some hot water would loosen up the PVC tube, that little trick would probably be handy in the instructions to help out someone new to water cooling (such as myself).

While initially degassing I got my first look at the illuminated front display. It is easily seen with the lights on and not too bright and flashy in the dark.

Installing the water block was easier than any air cooler I have installed. Without any sort of obstruction from a bulky fan or large cooling fins, it's a quick affair and the clip works with the existing s939 bracket.

Next I connected one tube to the CPU block and the Reserator's ‘OUT’ connection. At this point if you had the optional water blocks for either the VGA or northbridge chipset you would route the other tube to that water block. As I just have the CPU block, the other tube gets attached to the ‘IN’ connection on the Reserator.

When installing you can route the cables through the included I/O panel, however I used the existing holes on my case to run the hoses.

The installation was very simple and issue free. I think I turned a little obsessive with making sure everything was hooked up properly before giving it a go on the leak test. While there is no specified amount of time in the instructions to leak test, I let it run (with the PC unhooked from power) for a few hours to make sure no leaks emerged. As you can see I have the Reserator XT sitting on top of my case, and it's a pretty good size. This is about the only negative about installing the Reserator XT; making sure you have somewhere to put it. It really is like having an additional small form factor PC around.
Page 6 : Testing
So installation was rather a breeze, though it took a bit longer than installing your standard air cooler. Now it's time to see if this extra time and the Reserator XT are worth the wait. Below is the system I will be testing the Reserator XT on along with the heatsinks used for comparison.
CPU: Athlon64 3700+
MB: DFI LP NF4 Ultra-D
RAM: G.Skill 2x1GB PC-4000
GPU: XFX 7800GT
PSU: OCZ GameXStream 850W
HD: Western Digital 40GB IDE, Seagate 80GB IDE
DVD-Rom: Lite-On 18x DVD Burner – SATA
Comparison Coolers: Stock Opteron HSF and Thermalright SI-128 w/ Panaflo H1A 120mm
Ambient Temperature: 24-25C
To produce load temperatures I fired up F@H and let it run at 100% load for a minimum of an hour and used temperature readings from MBM 5.
To start off I used stock settings on my Athlon64 3700+. I tested both the Auto setting as well as turning the Reserator XT to manual and setting it to maximum fan and pump speed.

As you can see the difference in idle temps are negligible between the coolers, aside from the stock AMD cooler. On the auto setting, the Reserator XT easily beats the SI-128 by 3C and does this with far less noise. Set to manual on high, temps drop an additional 2C, however it is a bit loud at this setting and usually the biggest draw for water cooling is silence. Altogether I am very pleased with the results at stock settings.
Now lets kick things up a bit and see what we get.

There's not much of a difference in idle temperatures, but that really isn't surprising because temps under load are where the Reserator XT really shines. There is a drop of 11C from the stock cooler and 5C from the SI-128. Putting the Reserator on high drops the temps an additional 2C, but the increase in noise really doesn't make it worthwhile in my opinion.
Page 7 : Conclusion
Zalman continues their reputation for quality products with the new Reserator XT. The Reserator line finally gets active cooling to compliment its passive cooling with positive results. The Reserator XT is built to be as quiet as possible, but those who don't mind the extra noise are still able to manually increase the fan and pump speed to squeeze a little more performance out of it. Zalman continues to bring top quality water cooling to inexperienced and experienced users, and the Reserator XT is no exception. While the price is quite a bit higher than the top of the line air coolers, the unit is far quieter than high CFM fans and is expandable with additional water blocks.
My experience with the Reserator XT has been completely positive, and I would say the only drawback to the Reserator XT is the size of the unit and the fact that it sits outside of your case. This is an obvious aspect to the unit and you would have considered this before purchasing the unit, so you won't be blindsided by this particular aspect. This tiny drawback really doesn't do anything to diminish this fine product offered by Zalman.
Positives
- Quiet
- Easy Installation
- All in one water cooling solution
- Quality construction
Negatives
- Size
- Price
Overclockers Online would like to thank Zalman for supplying the Reserator XT for review.